


This article will show you how you can add Virtual Services to your Party Pro Manager Catalog. In fact, with a bit of creativity, you can follow similar steps to add all-kinds of unique offerings to your clients!
If you'd like to see an example of all of this in action, have a look at this sample company page we've set up. Just click on the "Get an instant quote" button to see a booking form with a mix of live event services and virtual services.
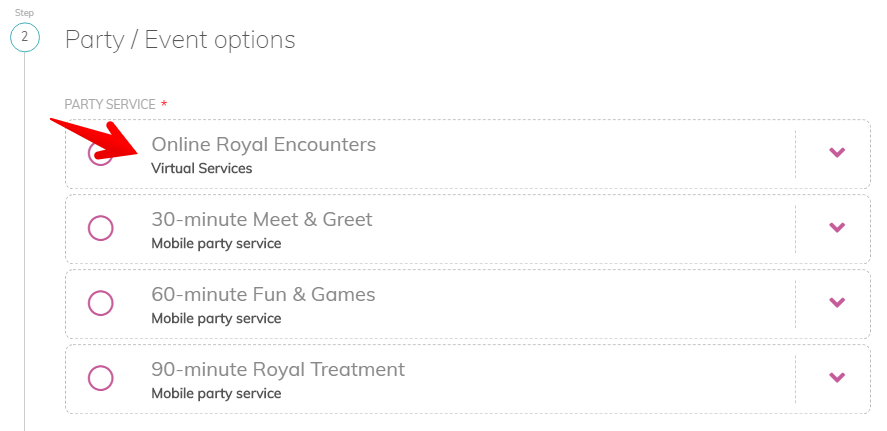
Here are a couple of screenshots of what your Virtual Services could look like on your booking form:

OK, let's do this!!
☝️Tip: If you’re unsure whether to create a separate catalog for virtual offerings, start by adding Virtual Services as another Booking Pathway in your existing catalog. You can always split it into a separate catalog later (plan permitting).
Step 1: Create a new "Booking Pathway" for your Virtual Services
- Go to "Catalogs" in the main menu
- Click on the Catalog you want to update to "Manage Catalog"
- Click the "+ BOOKING PATHWAY" orange button at the top of the page
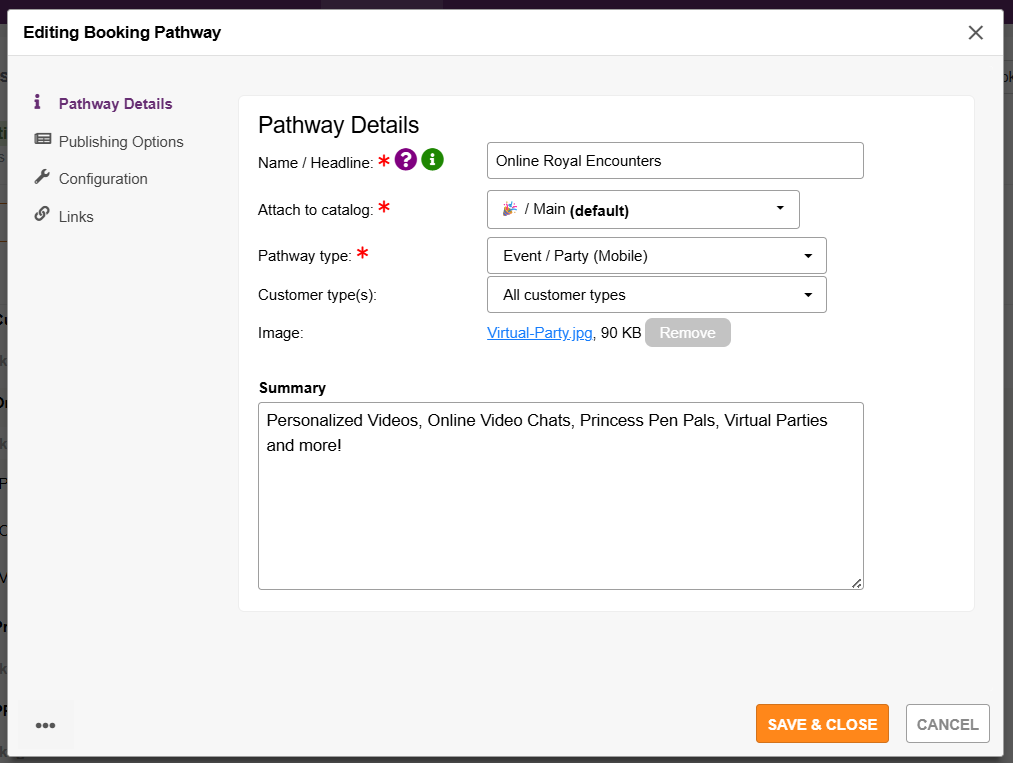
- Enter the "Name / Headline" for your new service option
- Select a "Pathway type", we recommend selecting the "Event / Party (With venue included)" option
- Select customer types this pathway is for (as you see fit)
- Add a "Summary" to describe your new pathway
Step 2: Select your Publishing Options
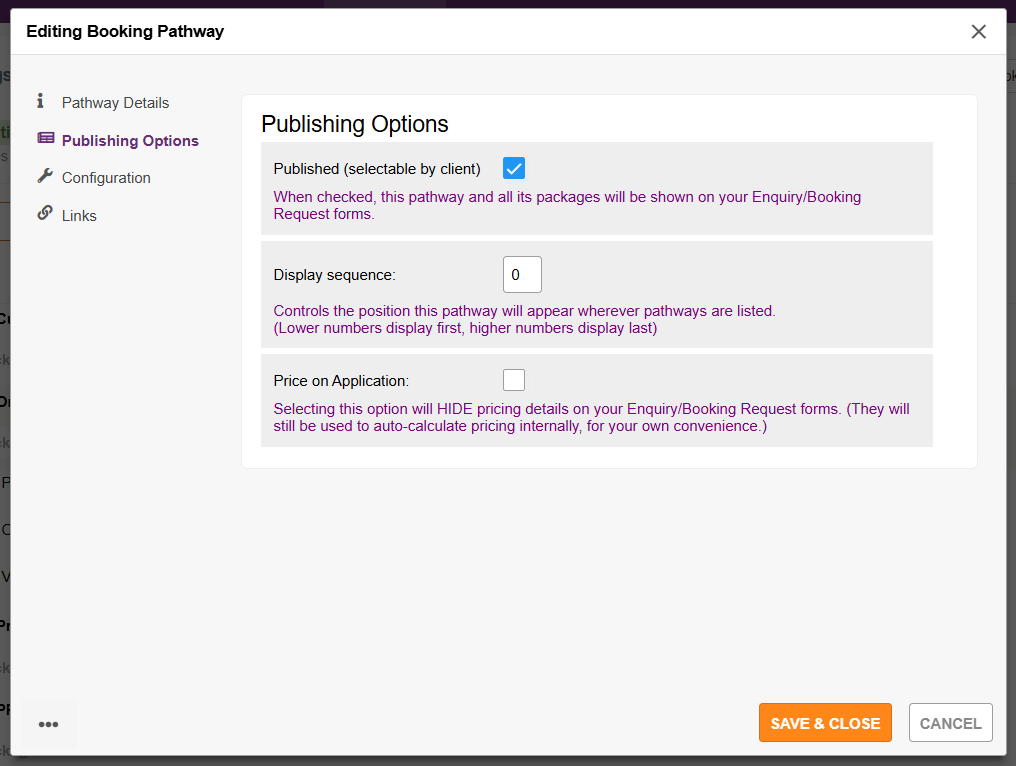
- Click "Publishing Options" in the left sidebar menu of the popup Editing Booking Pathway window
- Make sure the check box is checked for "Published (selectable by client)" so that your new pathway will appear on your live booking form when you are done
- Enter the display sequence so that this service appears in the right spot on your list of pathways. I've gone with 0 to ensure it is always at the top (you can change this later)
Step 3: Configure the display options for your new pathway
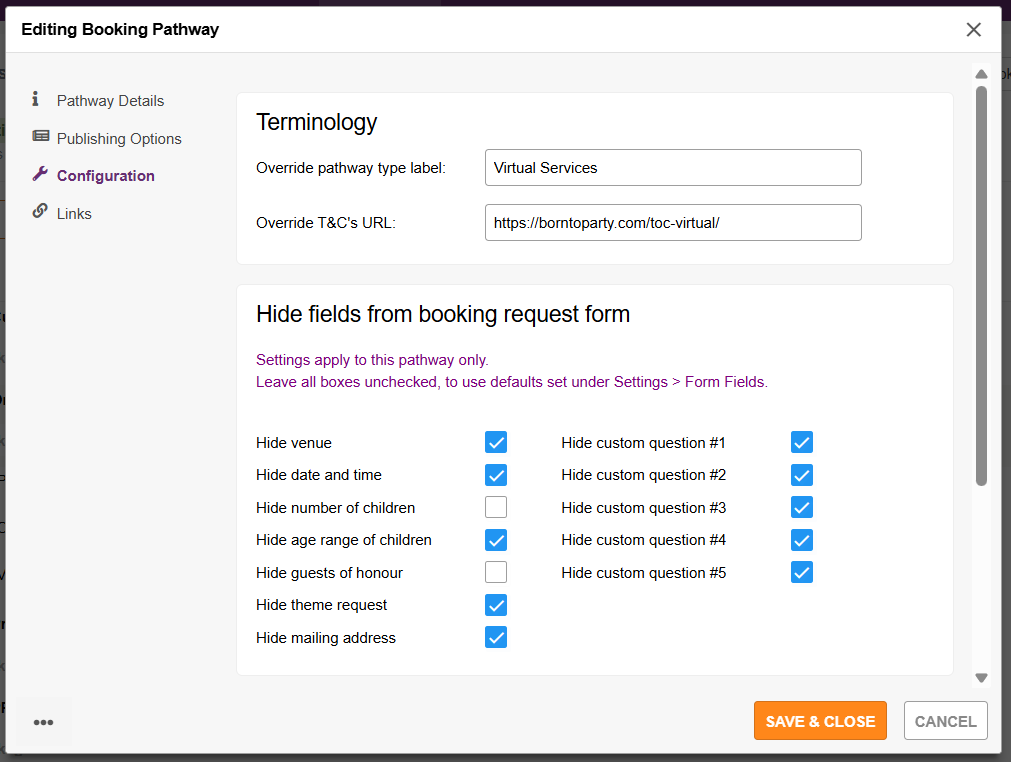
- Click "Configuration" in the left side bar menu of the popup
- First thing we're going to do is enter a value for the "Override pathway label type" field. Because earlier we selected the "Event / Party (With venue included)" for the Pathway Type, by default our new pathway will be labeled as "We provide the venue". We're going to override this term for this pathway only by entering "Virtual Services"
- Then we're going to hide portions of our booking form that are not applicable for this new service type by putting a check in the box for any segments we don't want to include (see image below for list of options I've chosen to hide)
- Hide venue: hides fields that request an event location address
- Hide date and time: hides filed that request desired dates and times
- Hide number of children: hides field that asks for estimated number of children
- Hide age range of children: hides fields asking for age range of guests
- Hide guests of honour: hides fields asking for name and age of guest of honour
- Hide theme request: hides the field asking for a requested party theme (if you've activated this optional field)
- Hide mailing address: hides fields asking for a mailing address (if you've activated this optional field)
Step 4: Save changes
- Click "SAVE & CLOSE" button to save changes
Step 5: Add Packages to your Booking Pathway
- Just like any other pathway, next step is to add a package. Simply navigate to your Catalog in your PPM admin and hover over the new Booking Pathway you've added. A "+ PACKAGE" button will appear. Click to add a new package.
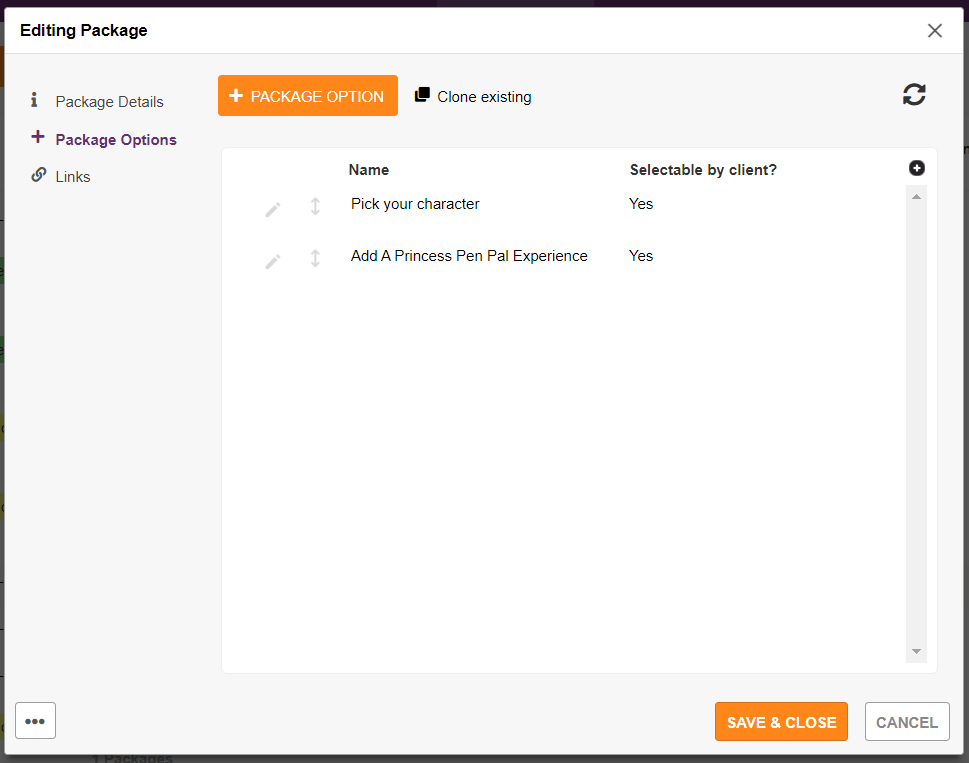
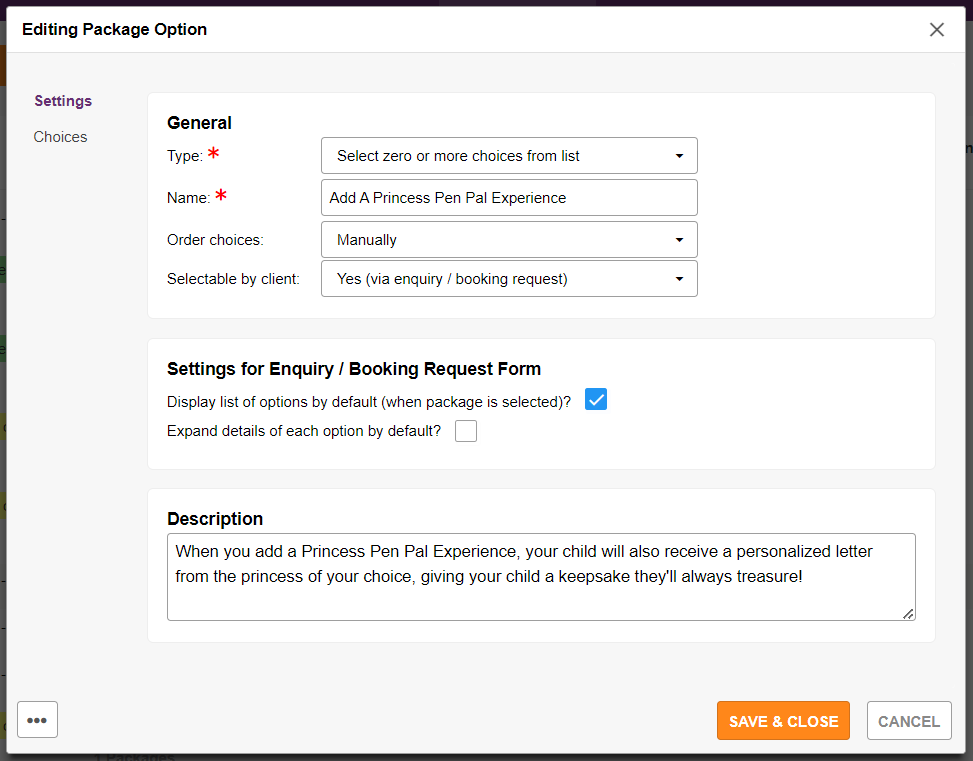
- Now you can add whatever Package(s) you'd like for this pathway AND any additional options and choice as you see fit


As mentioned at the start of this article, with a bit of creativity the same process can be followed to add many non-event products and services! Enjoy!!