


To Access: Go to "Settings" > "Brands"
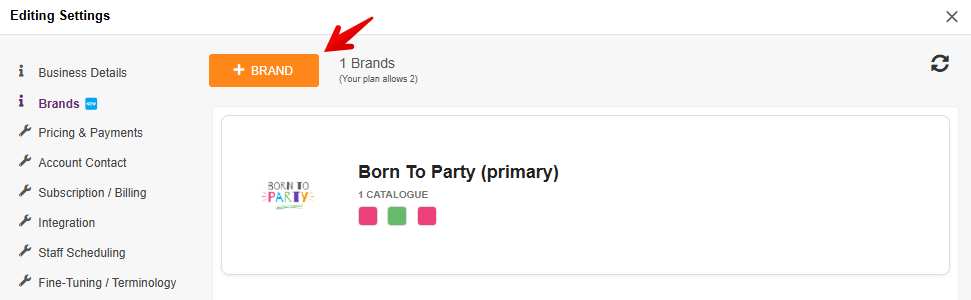
All accounts will have a "Primary" brand they can add/edit. Depending on your plan, you may also have the ability to add additional brands to use on select client-facing forms and communications.
To edit an existing brand, simply click on that brand in the list of brands on the Brands page.
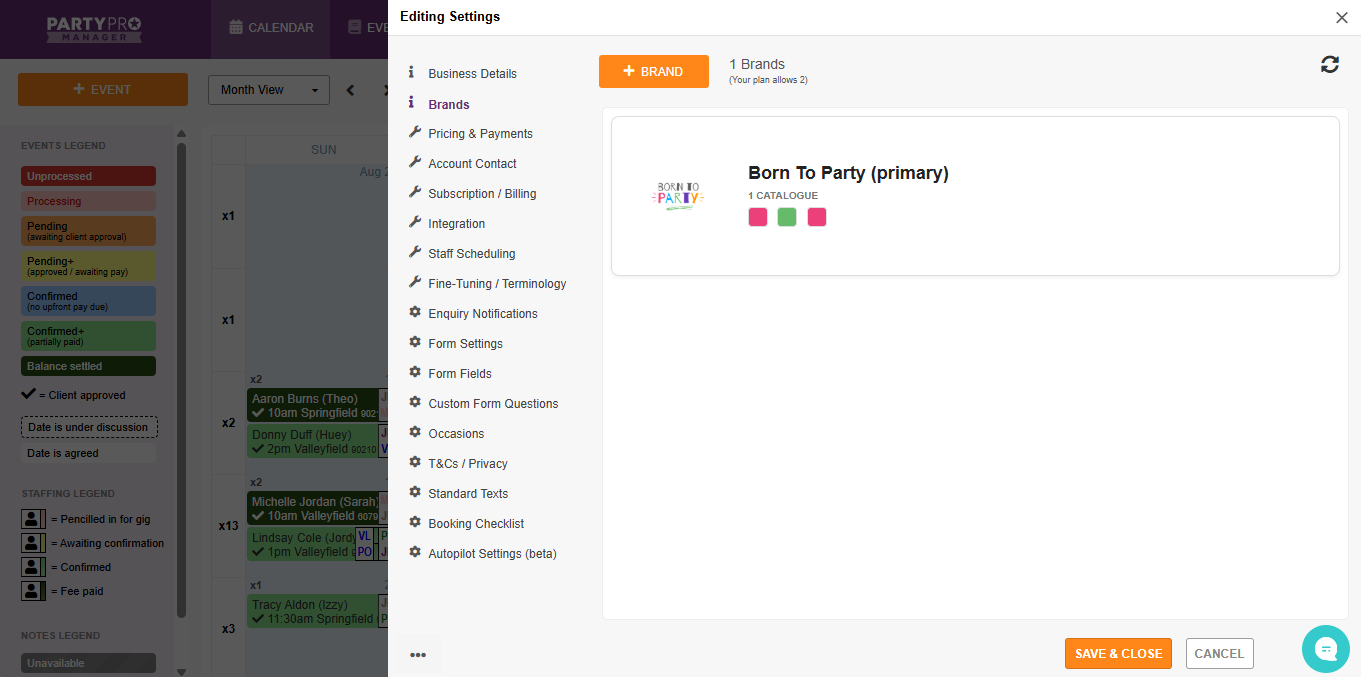
To add a new brand, click the "+ BRAND" button at the top of the page.
Whether you are editing an existing brand, or adding a new one, the Brand Editor will pop open. This editor has several sub-section, they are:
- Brand Info
NOTE: For the primary brand, the fields in this section are disabled as they are set centrally, under the 'Business Details' tab- Brand name
- Website
- Telephone
- Branding
- Internal Brand Identifier
- This enables you to choose an emoji or initials to use (for internal purposes only) to help quickly identify the selected brand for a given event or catalog in various spots throughout the system. Here's an example of these emoji identifiers in the calendar view
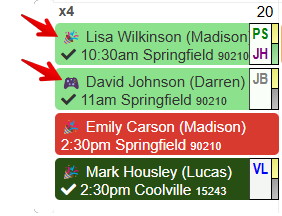
- This enables you to choose an emoji or initials to use (for internal purposes only) to help quickly identify the selected brand for a given event or catalog in various spots throughout the system. Here's an example of these emoji identifiers in the calendar view
- Brand Logo
- Click "Choose an image" to add a new logo (or "Remove" to remove an existing image)
- Logo border
- "Rounded white border" adds a white rectangle with rounded corners behind your logo

- "No border" places your logo directly on the background colour you choose (in a later step)

- "Rounded white border" adds a white rectangle with rounded corners behind your logo
- Email / PDF headers
- This determines what your header will look like in the emails and PDFs PPM generates for you. You have three options here:
a. “Show logo and company name”
b. “Show logo and tagline”
c. “Show logo only”
- This determines what your header will look like in the emails and PDFs PPM generates for you. You have three options here:
-
Tagline
- Enter your company tagline here
-
Shortcut icon URL
- Enter a full URL for your “Shortcut icon URL”. This is the image you want to appear in the tab at the top of the browser.
- Internal Brand Identifier
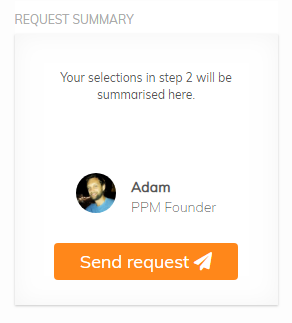
- Public Point-Of-Contact
This person will be presented publicly (e.g. on your enquiry forms) to provide an extra personal touch. It does not need to be the person that will always reply to enquiries. All emails will be sent to the address entered under the 'Business Details' tab. (see sample below)- First name
- Position / caption
- Profile image
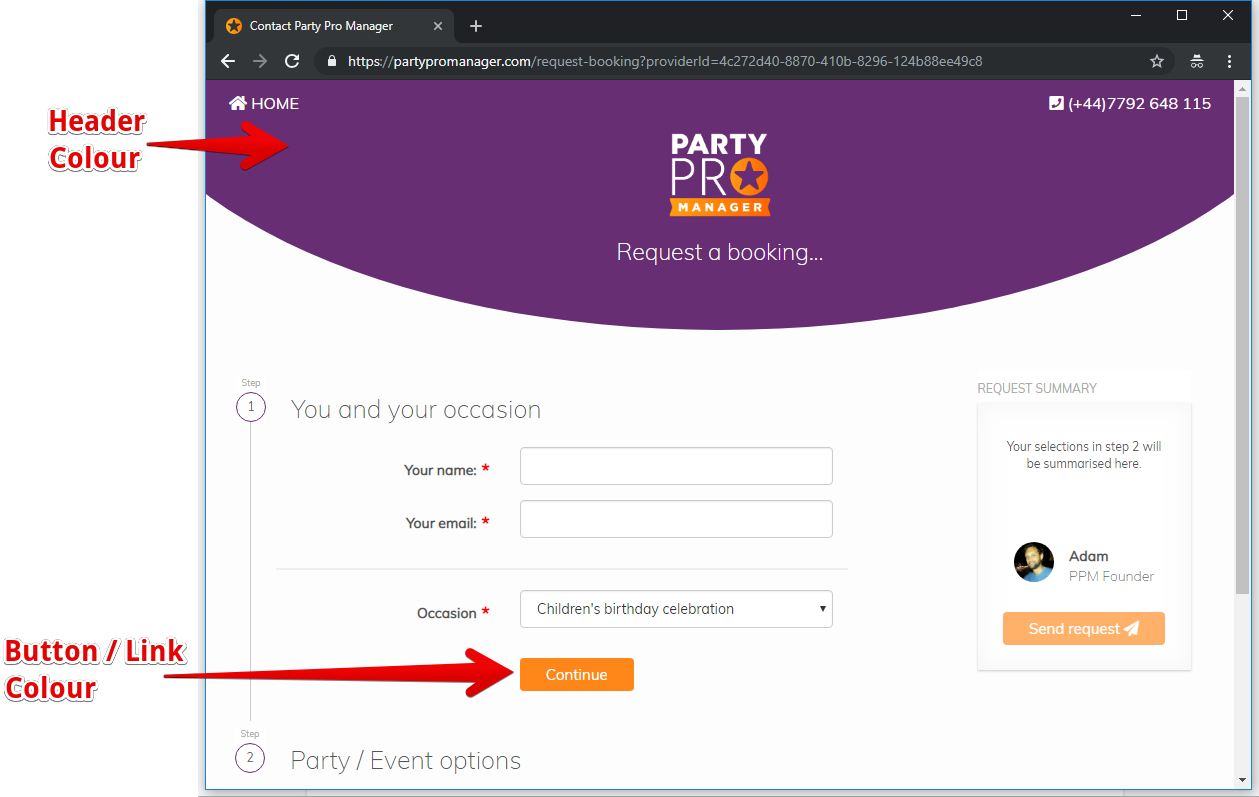
- Theme / Custom Colours
- Header colour (either enter "hex colour code" or use the clickable colour-selector)
- Button / Link colour (either enter "hex colour code" or use the clickable colour-selector)
- Email margin colour (either enter "hex colour code" or use the clickable colour-selector)
- SMS Integration (Optional)
Only displays if you have the SMS Power-Up enabled for your account.
NOTE: For the primary brand, the fields in this section are disabled as they are set centrally, under the 'Integrations' tab.- Short brand name (Max 18 chars)
- Content for 'Check your email' SMS
🚨 BE SURE TO CLICK "SAVE" TO SAVE YOUR CHANGES 🚨
NOTE: Some of the features mentioned in this article are available on select plans only. Please feel free to review the available plans and what's included in each.MSG: FTRLMT